
Enroll Course Now
Linux Mint is a user-friendly and versatile Linux distribution known for its polished desktop environment and ease of use. It is based on Ubuntu and Debian and offers several desktop environment options. Its flexibility and the availability of a vast software repository make it adaptable to various applications and user preferences.
In this tutorial, I will show you how to install Linux Mint (Victoria) on your computer step by step.
Table of Contents
Ensure you have a backup of the important files while replacing your current OS with Linux Mint to prevent data loss.
The process of installing Linux Mint on Windows or any other OS comprises of four fundamental steps. This includes downloading the ISO file, making a bootable device with the ISO file, following the installation wizard, and finally post-installation setup.
To install Linux Mint 21.2 on your computer easily, follow the below steps:
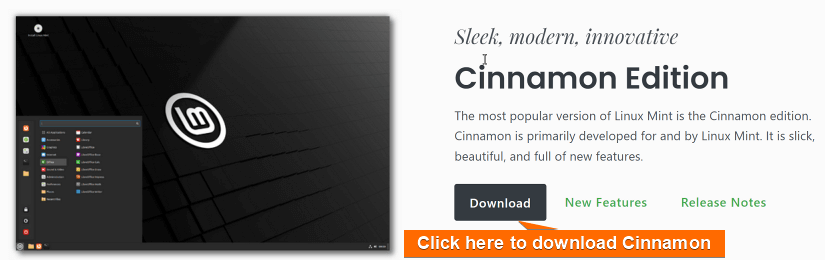
After backing up data, the first step of installing Linx Mint is to download Linux Mint ISO. There are four types of Linux Mint available – Cinnamon, MATE, Xfce, and EDGE edition. Among them, Cinnamon is the most popular version of Linux Mint. It is slick, beautiful, and full of new features and primarily developed for beginners. So, click on the download button of Cinnamon.
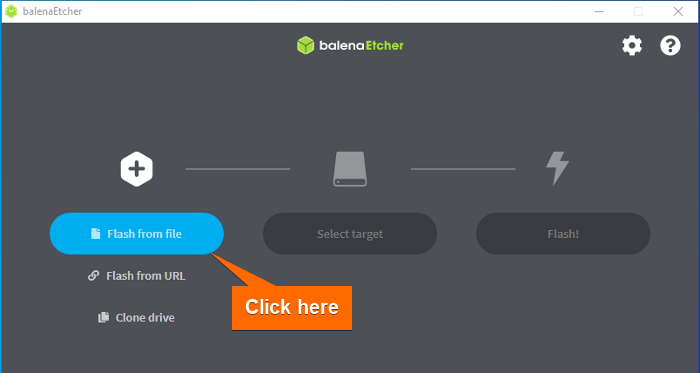
To create a bootable USB drive of the ISO file, use “Etcher” which is a free and open-source application. First, Install Etcher on Windows or MacOS. After installing, follow the steps:

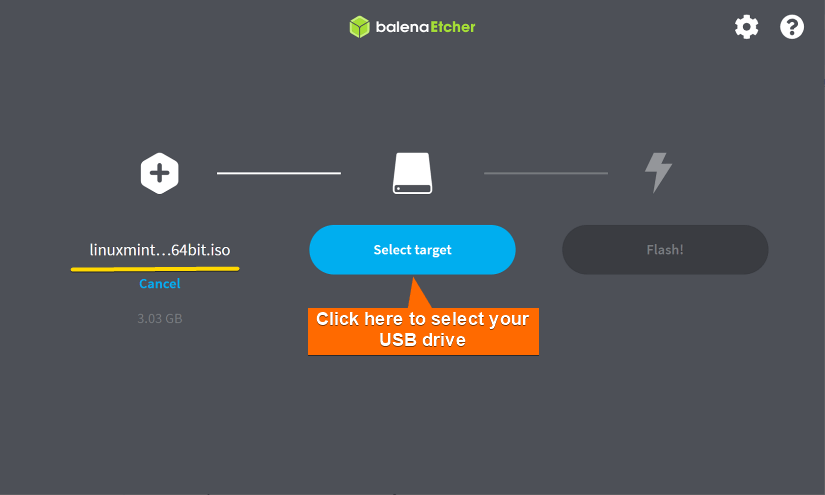
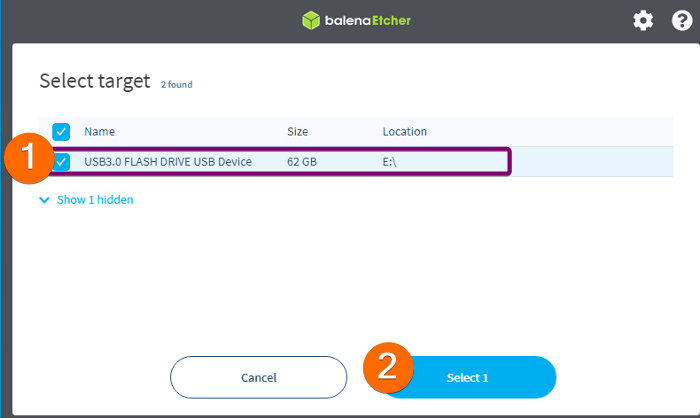
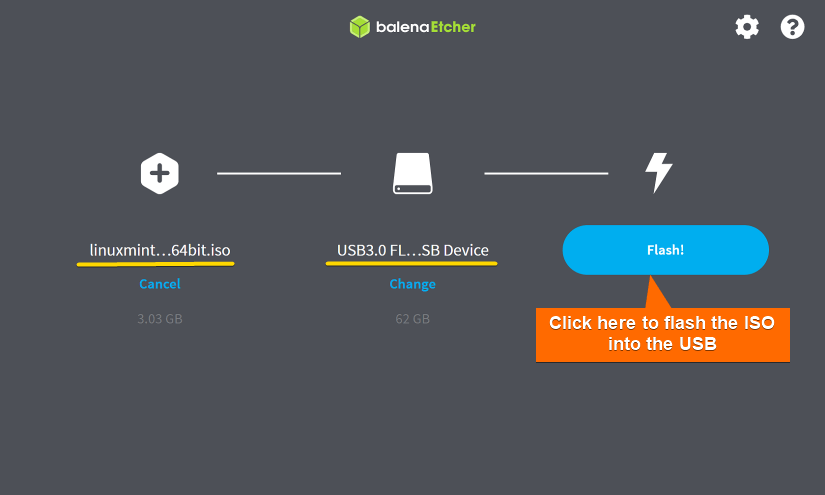
After that, Etcher will flash the ISO file into your USB drive and make it bootable.
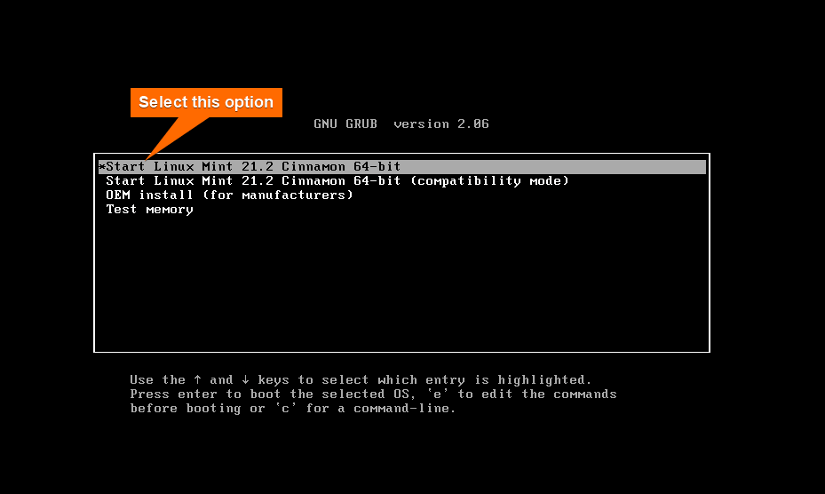
To boot Linux Mint from the USB drive, at first plug the bootable USB drive into the PC where you want to install it. Then, Restart the PC. It will automatically launch the boot window like this.
To launch the setup window manually, restart your PC and press the BIOS key according to your device. F12 is the most common BIOS key, but ESC, F2, and F10 are alternatives for some devices. For macOS, hold down the COMMAND(⌘) + R keys immediately after turning the screen on.
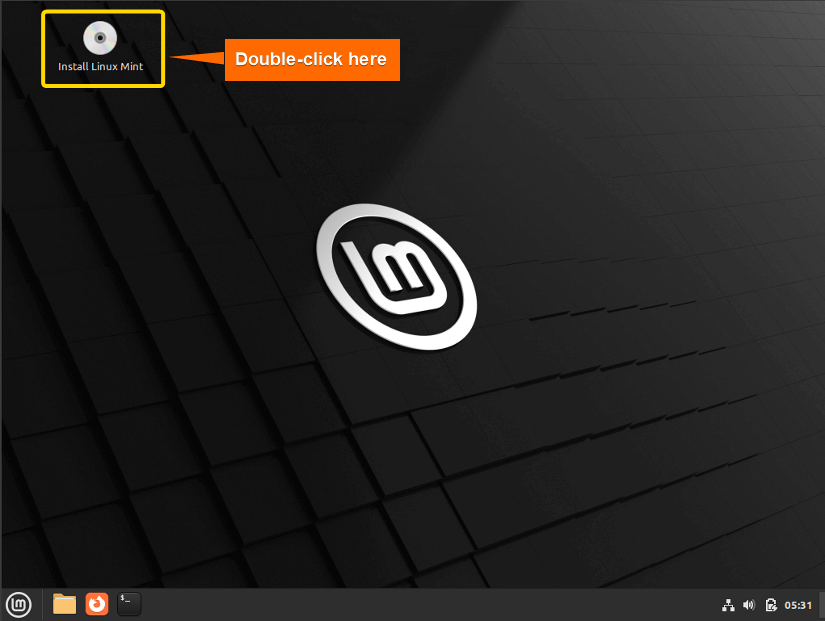
Now, the installation window will appear on the screen. Use the arrow keys to navigate the menu and select the first option “Start Linux Mint 21.2 Cinnamon 64-bit” and press ENTER.In a few seconds, the Linux Mint live environment will appear. There is an “Install Linux Mint” icon on the desktop. Double-click on it to start the installation procedure.
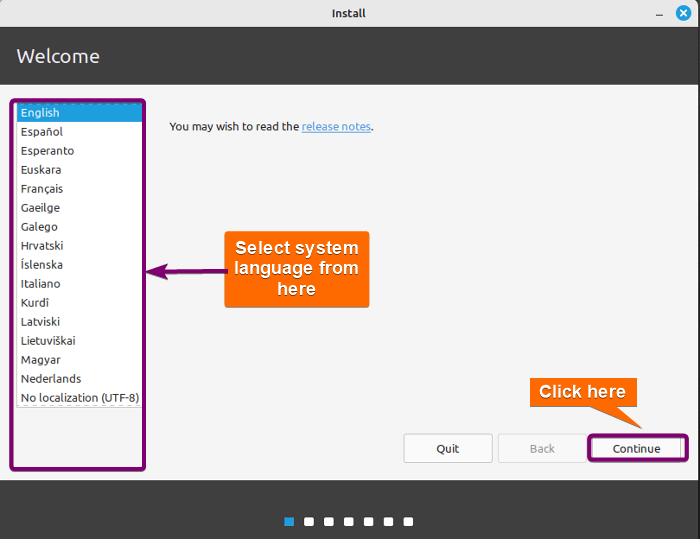
Select a language for the system and click on Continue.
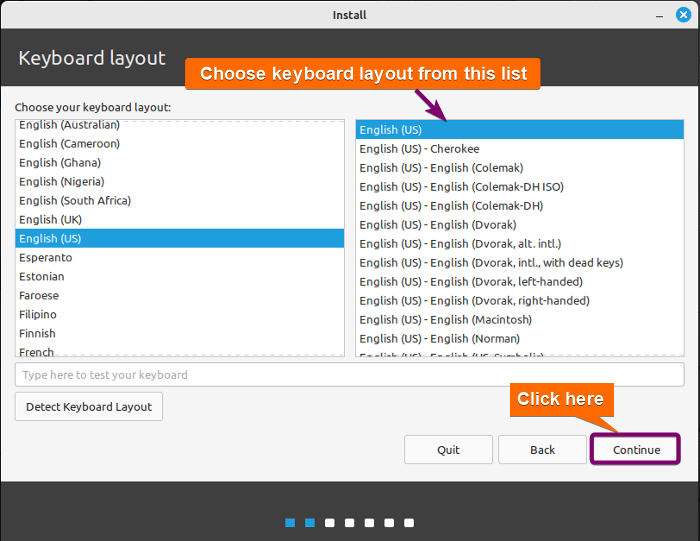
Select the keyboard layout from the Keyboard Layout window according to your preference. Then click on Continue.
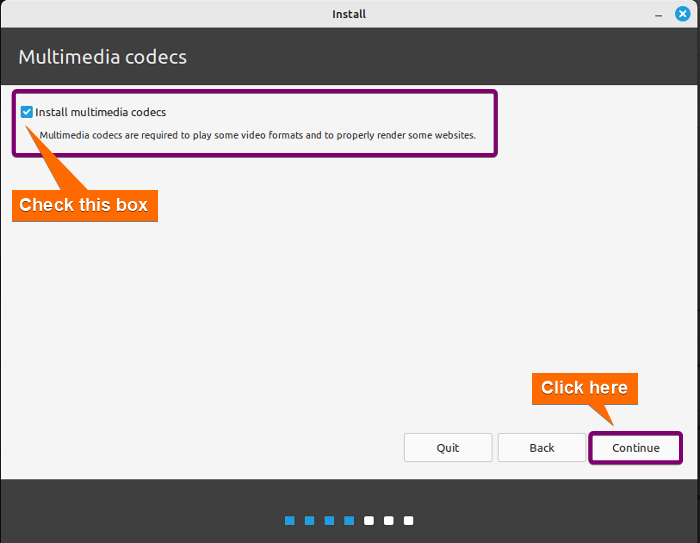
Multimedia codecs are additional packages that handle different audio and video file formats. Users often need to install these codecs separately to enable playback of certain media formats. To install these, click on the checkbox “Install multimedia codecs” and click on Continue.
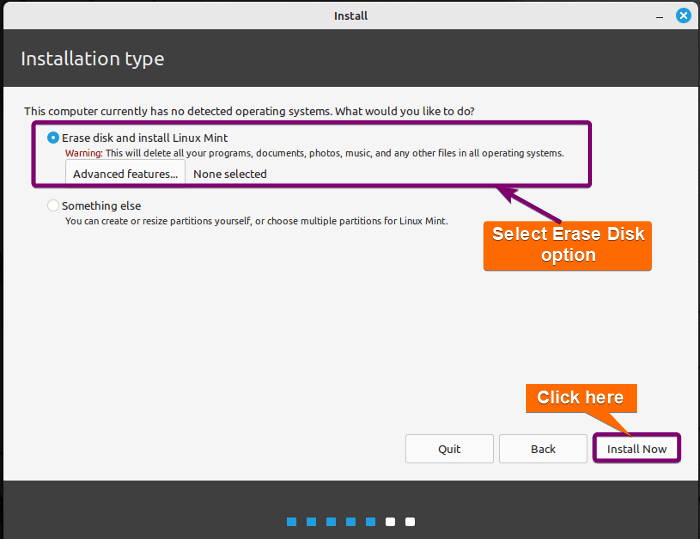
Two types of installation option appears here. Select “Erase disk and install Linux Mint” for a single installation. This is the easiest installation method that doesn’t require additional disk partitioning.
Warning: Selecting the “Erase Disk and install Linux Mint” option will wipe out the previous OS and Linux Mint will be the only OS in your system. So, backup your important data before proceeding to the next step.
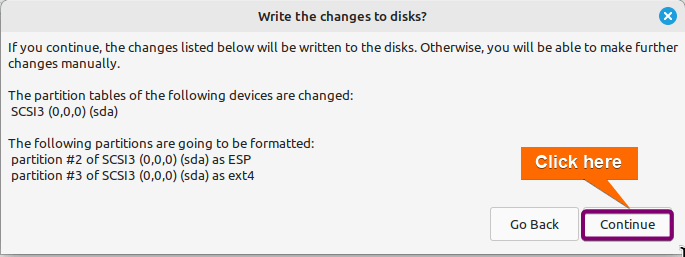
Click on Continue to confirm installing Linux Mint on the entire disk.
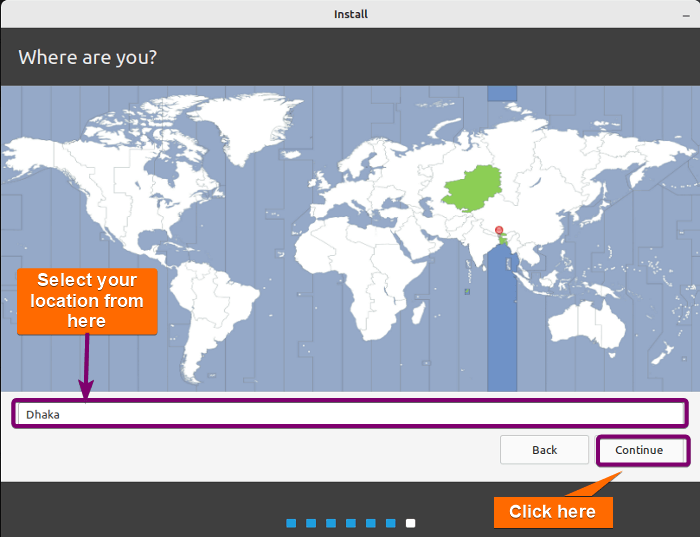
Select your location from the drop-down menu of the map screen. However, this information will be detected automatically if the computer is connected to the internet. Then, click on Continue.
On this screen, type your name, computer name and a username. Then type and re-type a strong password. Finally, select “Require my password to log in”. Selecting this option will ask for the password every time you power on your PC. Click on Continue.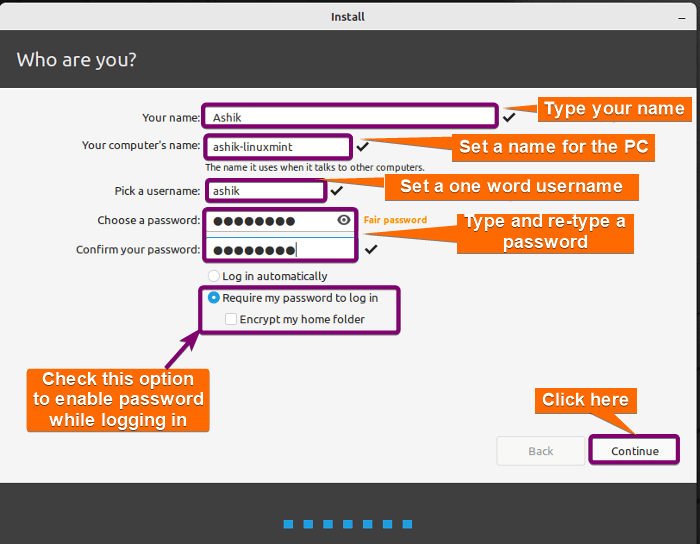 Now, installation will start. It may take a few minutes.
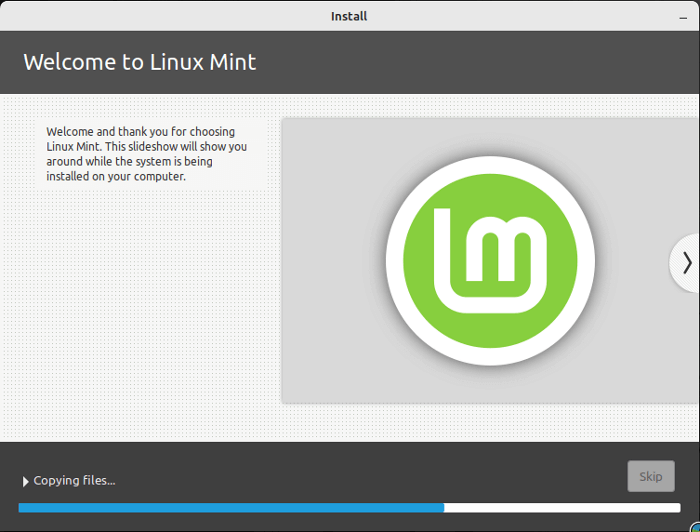 At the end of the installation, an “Installation Complete” prompt appears on the screen. Click on Restart Now in this prompt.
Type the password that was set during installation and press ENTER.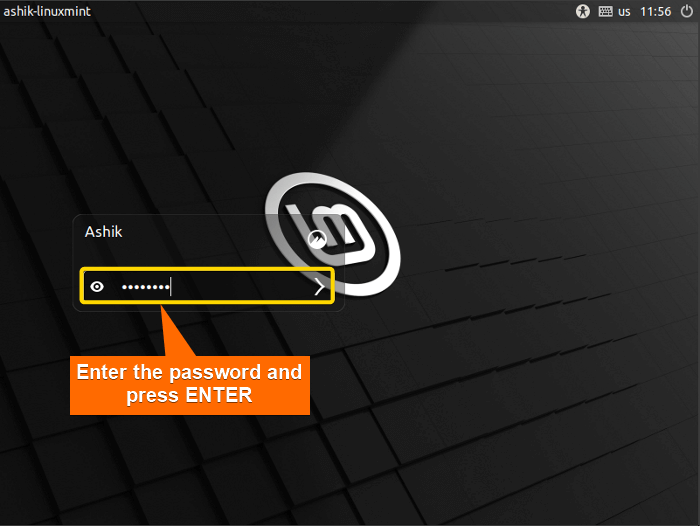 Now, you will see a welcome screen like this:
 Uncheck the “Show this dialog at startup” to avoid this window from the next log-in. Then simply close the window by clicking the cross icon at the top right corner.
That’s it. You’ve successfully installed Linux Mint in your computer.
Installing Linux Mint is a seamless and user-friendly process, offering a robust and customizable operating system for beginners and advanced users alike. With its intuitive interface and diverse range of features, Linux Mint stands as a reliable choice, providing stability, security, and a vibrant community of support. However, follow the simple steps described above in this article to install Linux Mint in the easiest way. Feel free to comment below if you face any difficulties during installation.
There are four editions of Linux Mint available – Cinnamon, MATE, Xfce, and EDGE edition. Among them, Cinnamon is the most popular version of Linux Mint. The MATE edition involves the continuation of GNOME 2. Xfce is a lightweight desktop environment. It doesn’t support as many features as Cinnamon or MATE, but it’s extremely stable and very light on resource usage. And finally, EDGE comes with a newer kernel to be able to support the latest hardware chipsets. If you cannot boot the regular editions, we recommend you try the “EDGE” instead.
Of course, Linux Mint is a great version of Linux for both beginners and experts alike. Mint 21 is based on Ubuntu 22 and offers a user-friendly interface with a variety of customization. Linux Mint is also known for its stability, reliability, and security. It is one of the most popular Linux distributions and has been consistently ranked as the best Linux desktop for both beginners and experienced users.
Cinnamon is the default and most popular Linux Mint edition. However, if you prefer a lightweight operating system without compromising on important features, install the MATE edition. But If you want a fast and stable release, choose the Xfce edition. Although the best edition of Linux Mint specifically depends on your priorities, you should choose Cinnamon if you don’t have any major preference.
No, Linux Mint does not have a server version. However, it is possible to use Linux Mint as a server, but it is recommended to use a headless system running Ubuntu server instead. You can use the Ubuntu server with Linux Mint, which is highly compatible with each other and it can be administered through a web browser using the ‘webmin’ tool.
If you don’t have a USB drive, there are still a few ways to install Linux Mint on your computer. Here are some options:
Linux Mint is faster than Ubuntu. While Ubuntu’s default flavor is best suitable for modern devices with high-end hardware, Linux Mint runs smoother on old equipment as well as a current machine. If you have a comparatively new machine, the difference between Ubuntu and Mint may not be that discernable. Mint may seem a little quicker in day-to-day use, but on older hardware, it will definitely feel faster, whereas Ubuntu appears to run slower the older machines.
Related Articles